As the popularity of craft beverages continues to rise, more and more people are taking up home brewing. For those interested in trying their hand at mead, a sweet honey-based alcoholic drink with ancient roots, we have a foolproof recipe that will guide even the most novice brewer from start to finish. In this post, we will outline the ingredients, equipment, and steps necessary to create a delicious 1-gallon batch of mead.
Understanding Mead
Before diving into the 1-gallon mead recipe, let’s take a moment to understand what mead is all about. Unlike beer, which is made from malted grains, or wine, which is made from fermented fruit juice, mead is crafted by fermenting honey with water and usually some fruits and spices for added flavor. The result is a unique beverage that can range from dry to dessert-like in its sweetness.
Ingredients:
To get started on your mead-making journey, gather these simple ingredients:
1. Honey – 2.5-3 pounds
2. Water – 1 gallon (preferably spring water)
3. Yeast – Champagne yeast or Lalvin yeast
4. Nutrients – Fermaid O or other yeast nutrients
5. Optional Flavorings – Fruits (such as berries or citrus), spices (cinnamon sticks or cloves), or herbs (lavender or rosemary)
It’s worth noting that while it may be tempting to experiment with different types of honey and flavorings right off the bat, it’s best for novice brewers to stick with traditional recipes until they have gained more experience.
Equipment:
Before starting the brewing process, make sure you have the following basic equipment:
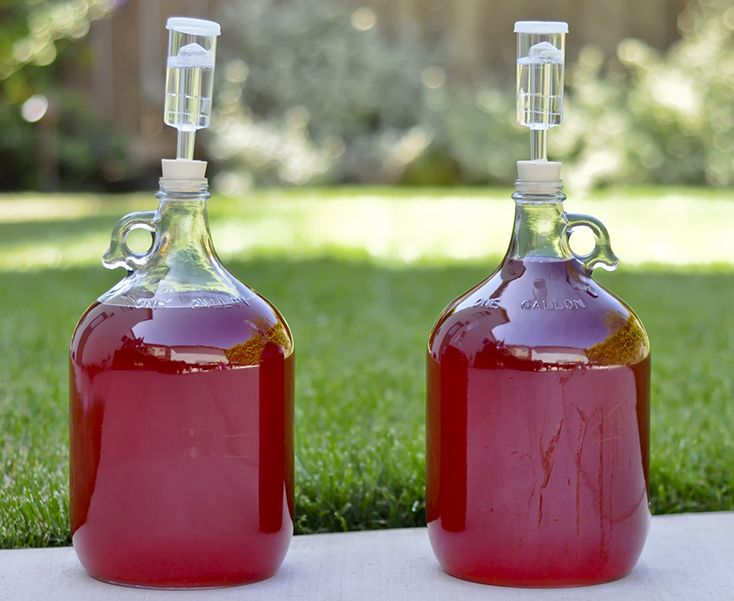
1. Fermenting Vessel – A 1-gallon glass carboy or plastic bucket.
2. Airlock and Bung – To prevent oxygen and other contaminants from entering during fermentation.
3. Racking Cane and Tubing – This is used to siphon the mead without disturbing the sediment.
4. Hydrometer – To measure the specific gravity of the mead.
5. Sanitizing Solution – To ensure cleanliness throughout the process.
The Brewing Process:
Now, let’s dive into the step-by-step process of making your own delicious 1-gallon batch of mead:
Step 1: Sanitize Everything
Ensure that all your equipment is thoroughly cleaned and sanitized to avoid any unwanted contamination. Use a sanitizing solution and follow the instructions provided.
Step 2: Mix Honey and Water
In a large pot, mix 2.5-3 pounds of honey with one gallon of water. Stir until all the honey is fully dissolved.
Step 3: Cool the Mixture
Allow the honey-water mixture to cool to room temperature or around 75-80°F (24-27°C) before proceeding to the next step. This is important because pitching yeast at higher temperatures can harm their effectiveness.
Step 4: Pitch Yeast
Once cooled, add your preferred yeast into the fermenting vessel. Refer to the yeast packaging for specific instructions on rehydration if necessary.
Step 5: Add Nutrients (Optional)
If you’re using nutrient additives like Fermaid O, sprinkle them into the fermenting vessel according to package recommendations. These nutrients help support healthy yeast fermentation and enhance flavor development.
Step 6: Incorporate Optional Flavorings (Optional)
If you wish to add fruits, spices, or herbs for additional flavors, prepare them by chopping or crushing them as needed. Gently stir them into the honey-water mixture in your fermenting vessel.
Step 7: Fermentation Time
Attach an airlock filled halfway with sanitized water onto your fermenting vessel to allow carbon dioxide to escape while preventing oxygen and contaminants from entering. Store it in a cool, dark place with a consistent temperature between 60-70°F (15-21°C) for approximately 2-4 weeks.
Step 8: Measure the Progress
At regular intervals, use a sanitized hydrometer to measure the specific gravity of the mead. Once the reading stabilizes at or below 1.000 (indicating fermentation is complete), you can proceed to the next step.
Step 9: Racking
Carefully siphon off the mead from your fermenting vessel into a clean carboy or another container. Be sure not to leave behind any sediment and minimize splashing to prevent oxidation.
Step 10: Aging and Sampling
Once racked, seal the carboy with an airlock and age your mead for at least three months. During this time, flavors further develop, and clarity improves. Feel free to test the taste periodically until you achieve your desired flavor profile.
Conclusion
Making mead can be an incredibly rewarding experience for new brewers. By following this foolproof recipe, even those with no previous brewing knowledge can create a delicious batch of homemade mead from start to finish. Experiment with different honey varieties and flavors as you gain confidence and proficiency, ultimately crafting unique meads that showcase your personal touch. Happy brewing!